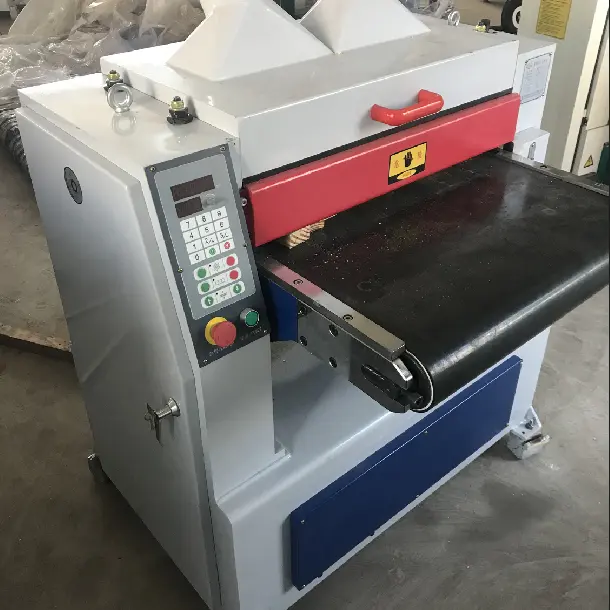
Whether you are a hobbyist or a professional, a cut-to-thickness planer is an essential tool for woodworking. This powerful machine allows you to achieve an even thickness on your wood, ensuring your project has a polished and professional finish. In this article, we’ll explore what a planer is, how it works, and provide a step-by-step guide on how to use a planer effectively.
What is a planer?
A planer, also called a planer or planer, is a woodworking machine designed to trim boards to a consistent thickness. It removes material from the surface of the wood, leaving you with a flat, smooth surface. A thick planer is particularly useful for preparing logs because it can transform uneven, warped, or rough-sawn boards into completely flat and uniform boards.
Key components of planer
- Infeed and Outfeed Tables: These tables support the wood as it enters and exits the machine. They help maintain stability and ensure smooth feed.
- Blade: This is the rotating part of the planer that houses the blades. The cutter head removes material from the surface as it passes through the wood.
- Depth Adjustment Mechanism: This allows you to set the desired thickness of wood. It can be a simple knob or a more complex digital readout.
- DUST PORT: Most planers are equipped with a dust port to help manage the sawdust generated during the planing process.
Benefits of using a planer
- UNIFORM THICKNESS: Achieving a consistent thickness across multiple boards is essential for joinery and overall aesthetics.
- Smooth Surface: Planers can remove rough surfaces, leaving a smooth surface that requires less sanding.
- SAVES TIME: Planing wood to the desired thickness is faster than planing by hand, allowing you to complete your project more efficiently.
- VERSATILITY: Thickness planers can handle various types of wood, making them suitable for a variety of woodworking projects.
How to Use a Thickness Plane: A Step-by-Step Guide
Step 1: Prepare your workspace
Before you start using your router, make sure your workspace is clean and organized. Remove any debris that may interfere with machine operation. Make sure there is adequate lighting and that the planer is placed on a stable surface.
Step 2: Gather materials
You will need the following materials:
- The log you want to plane
- Goggles
- ear protection
- Tape measure or calipers
- Straight edge or square
- Dust collection system or vacuum cleaner (optional, but recommended)
Step 3: Setting Up Thickness Planer
- CHECK BLADE: Before using the planer, check whether the blade is sharp. Dull blades can cause tears and a poor finish. If necessary, replace or sharpen the blade.
- Adjust cutting depth: Determine the amount of material that needs to be removed. A good rule of thumb is to make each cut no thicker than 1/16 inch (1.5 mm) for hardwoods and 1/8 inch (3 mm) thick for softer woods. Use the depth adjustment mechanism to set the desired thickness.
- Connect Dust Collection: If your planer has a dust collection port, connect it to a vacuum cleaner or dust collector to minimize mess and increase visibility.
Step 4: Prepare the wood
- Inspect the wood: Check the wood for any defects, such as knots or cracks. These all affect the planing process and the final result.
- Mark High Spots: Use a ruler to identify any high spots on the board. This will help you determine where to start planning.
- Cut to Length: If the board is too long, consider cutting it to a manageable length. This will make them easier to handle and feed into the planer.
Step 5: Plane the wood
- Feeding the circuit board: First place the circuit board on the feeding table, making sure it is flat and stable. Align it with the blade.
- Turn on the planer: Turn on the planer and bring it to full speed before feeding the board.
- Feed the board slowly: Gently push the board into the planer, applying even pressure. Avoid forcing through the wood as this may result in uneven cuts and potential damage to the machine.
- Monitor the process: Pay close attention to the sheet as it passes through the cutter head. Listen for any unusual sounds, which may indicate a problem.
- CHECK THICKNESS: After the board exits the planer, use a caliper or tape measure to measure its thickness. If the desired thickness is not yet achieved, repeat the process and adjust the cutting depth as needed.
Step 6: Finishing touches
- Check Surface: After reaching the desired thickness, check the surface for any defects. If necessary, you can lightly sand the board to remove any minor imperfections.
- CLEANUP: Turn off the router and clean up any sawdust or debris. If you use a dust collection system, empty it as needed.
- Storing Wood: Store planed wood in a dry, flat area to prevent warping or damage.
Safety tips for using a planer
- Wear Safety Equipment: Always wear eye protection and ear protection when operating a planer.
- Keep your hands away: Keep your hands away from the cutter head and never reach into the machine while the machine is running.
- Use the push bar: For narrow boards, use the push bar to guide the wood safely through the planer.
- Don’t force the wood: let the machine do the work. Applying force to the wood may cause kickback or damage to the planer.
in conclusion
Using a thick planer can significantly enhance your woodworking projects by providing a uniform thickness and smooth surface. By following the steps outlined in this guide, you can operate your planer efficiently and safely, transforming rough lumber into beautiful, usable lumber. Remember to put safety first and take your time for the best results. Happy woodworking!
Post time: Oct-28-2024

